Really pleased that I got 'Card of the Month' at Crafter's Companion's challenge for August! I will be back in the next few days with more of what I have been up to recently. I've got pics I just need to write up the posts!
Thanks for stopping by, see you soon!
Thursday, 9 October 2014

Tuesday, 30 September 2014
September Crafter's Companion Challenge: Autumn
Here is my entry into the September Crafter's Companion Challenge: Autumn.


I used these Crafter's Companion products:
Luminarte Radiant Rain Pourables in oranges, browns and greens
(no link as not on Crafter's Companion website at the moment)
Sheena's paint fusion brushes
(no link as not on Crafter's Companion website at the moment)
The wreath was one I picked up from Ebay. I wrapped some brown check gingham ribbon (from my stash) around the wreath and secured it on the back. I then made a paper ribbon from some mustard coloured handmade paper ribbon (also from my stash). I used the 3D glue gel to secure it at the top of the wreath.
I made some backgrounds by sponging different colours of the pourables onto some mustard and green cardstock. I dried this with my heatgun and then used Versamark to stamp and emboss the Sheena stamps with Cosmic Shimmer copper detail embossing powder. I then spent some time cutting these out carefully. I arranged the leaves and glued them onto the wreath to give them dimension with the 3D glue gel.
I made the acorns out of Martha Stewart paper clay and a Martha Stewart acorn mould the day before and left them to dry. I painted these with Pebeo acrylic paints and the paint fusion brushes - I love these brushes.
I hope that you like my wreath, I enjoyed making it!
Any comments will be well received - I appreciate you taking the time to read my blog.
Many thanks and happy crafting!
Tuesday, 2 September 2014
Felt Beach Hut Bunting
Hi all,
Tonight I am posting the beach hut bunting that I made out of felt for my sister. I made it as a present to take to her in Canada to remind her of home!
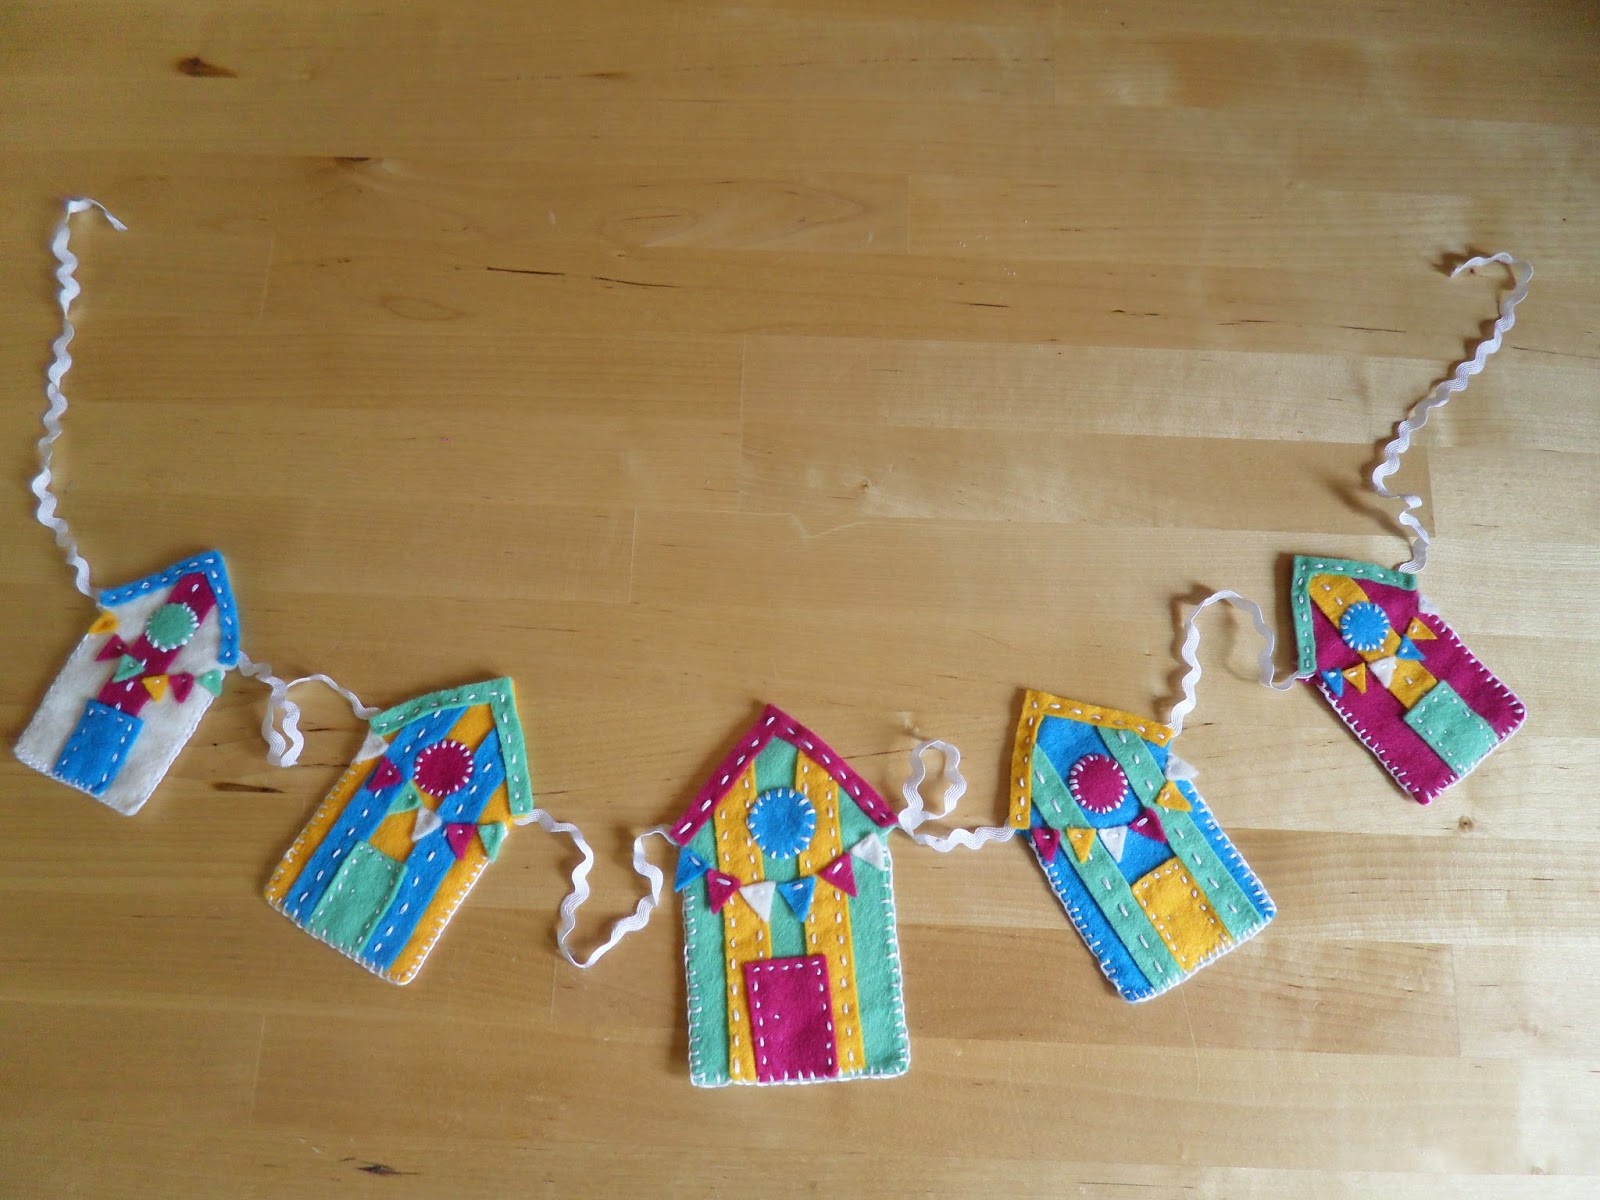


I used felt from Corrine Lapierre's Multibuy Pack of 3 x 5 9 Inch Felt Sheets with FREE Beach Huts Pattern in the 'Summer' option with white added from another kit. The felt is such lovely quality as it's wool felt - not like the cheap stuff at all. You get the pattern free with the felt which is a good deal. I re-sized the pattern on my scanner to 85% and 75% with the full sized one in the middle and the smallest at either end. On the smallest ones I just created one plank down the middle of the hut rather than the two on the larger ones.
This is my first go with felt and I really enjoyed it! Good to sit in front of the telly and do as it isn't messy like papercrafting and you can do it on a lap tray.
Thanks for stopping by!
Tonight I am posting the beach hut bunting that I made out of felt for my sister. I made it as a present to take to her in Canada to remind her of home!
This is my first go with felt and I really enjoyed it! Good to sit in front of the telly and do as it isn't messy like papercrafting and you can do it on a lap tray.
Thanks for stopping by!
Sunday, 31 August 2014
August's Crafter's Companion Challenge - All About School
So, cutting it fine to enter, but here's my entry for the August Challenge at Crafter's Companion - All About School. I have made a set of three pencil pots which I have photographed with a few of my crafting items in. They will however, be on my desk at school from Tuesday (I am a Teacher!)


I used this month's download: 'Crafting With Kids' from the Crafter's Companion website. I printed it off onto Crafters Companion Satin Finish Printer Paper. (I used the paper rather than Neenah card as paper is much easier to use to wrap the tins.) It was all printed at 100% apart from the three words on the third tin which I copied and pasted into Word to make them bigger.
I used three empty dog food tins which had the ring pull openers on them. This means that there isn't a sharp edge like you get using a can opener! I cut the papers to 9.8cm wide. (An A4 sheet is big enough to get two strips to cover two tins.) I wrapped Crafters Companion Red Liner Tape 6mm around the top and bottom of the tin and then went over it with a glue stick (this allows you some play to move the paper if needed. It's then permanent when the glue stick dries.) I covered all three tins like this with two different papers.
On the first tin I used the red spotty paper ribbon and the alphabet paper ribbon. I cut these out and then cut the red spotty one in half length ways. I glued them onto the tin with the red spotty paper ribbon framing the alphabet one.
On the second tin I made a rosette using Tim Holtz's 'Decorative Strip' die from Sizzix. I used the other half of the stripy and dotty ribbon paper that I covered the tin in. I then used a spotty purple button to finish it off with. I tied some embroidery thread through the button before I stuck it down as I don't like to use buttons without thread through them as I always think it looks unfinished! I used Collall 3D Glue Gel to stick the rosette together and onto the tin.
On the third tin I used the wide paper ribbon made up of six thin strips. I cut it into three so each section had two colours on it. I wrapped these around the tin, evenly spacing them. I mounted the words onto white with a 1/16" border using my Perfect Layer rulers. I then stuck these onto the middle of each paper ribbon on the tin again using the Collall Glue Gel.
Finished!
Thanks for stopping by! I hope you like them, if you do please feel free to leave a comment!
August's Clarity Challenge - Feminine
Hi all! Not feeling overly inspired today being jet lagged post my return flight from Canada after going to see my sister who lives out there. Nevertheless, I have attempted the Clarity Challenge this afternoon. 'Feminine' is the theme and I don't think I have any particularly feminine themed stamps from Clarity (although I have many other Clarity stamps!) I decided to use the Love Is In The Air Clear Stamp Kit.

I used Theuva card and distress reinkers to make the background using the shaving foam technique that Barbara has demoed recently on her blog. I used the Mountains and Hills Mask and the Moons Masks to section off the areas before applying the shaving foam. I then stamped the little girl and the hearts foliage in black archival. I added a couple of swallows from Remountable Birdhouse Garden Set Of Clear Stamps.
I matted and layered onto matt black card and then pink centura pearl. I thought the pink gave it a more feminine edge! I used my perfect layers to mat and layer - I love these tools and wouldn't be without them now - perfect everytime!
Thursday, 7 August 2014
More Clarity Stencils
Hi all,
Here's a quick card that I made for my sister using the beautiful Chrysanthemum Stencil.

I used the 7x7 Gelli card and taped the stencil on with low tack masking tape. I then used the Clarity stencil brushes and two distress inks: Fired Brick and Squeezed Lemonade. I used the Fired Brick working out from the corner and working more heavily in the corner. I worked to the middle of the flower and then introduced the Squeezed Lemonade from the outer edge of the petals and slightly over the middle area. This gave a tonal effect to the flower.
I matted the piece after slightly trimming it down onto some matching glitter card. I then layered it onto a white card blank. I finally added white organza ribbon to the spine of the card.
Here's a quick card that I made for my sister using the beautiful Chrysanthemum Stencil.
I used the 7x7 Gelli card and taped the stencil on with low tack masking tape. I then used the Clarity stencil brushes and two distress inks: Fired Brick and Squeezed Lemonade. I used the Fired Brick working out from the corner and working more heavily in the corner. I worked to the middle of the flower and then introduced the Squeezed Lemonade from the outer edge of the petals and slightly over the middle area. This gave a tonal effect to the flower.
I matted the piece after slightly trimming it down onto some matching glitter card. I then layered it onto a white card blank. I finally added white organza ribbon to the spine of the card.
Really pleased...
Really pleased...I made top 3 at the Crafter's Companion July Challenge! This was for the card in the post below.
For the other winners click here! Congratulations to the others and everyone who took part. I am currently thinking about what I will do for their August challenge!
I will be back later today with some new cards! Bye for now!
For the other winners click here! Congratulations to the others and everyone who took part. I am currently thinking about what I will do for their August challenge!
I will be back later today with some new cards! Bye for now!
Subscribe to:
Posts (Atom)