Friday 18 April 2014

MDF Seaside Plaque with Sheena Douglass' Stamps

Hi everyone!
I'm off away to a conference for a couple of days so quickly sharing something this morning that I made at a Sheena workshop a little while ago - I hadn't blogged it and I thought I should share.


Before using MDF you must gesso the background.  The Pebeo gesso (in the link) is fabulous quality and inexpensive.  This isn't a step that should be skipped as MDF sucks in your paints if you don't gesso first! It dries quickly and then you lightly sand it with very fine grade sandpaper.  Sheena showed us a technique that I had not used before which was using distress inks with Pebeo Studio Matt Gel Medium.  For the sky I used  faded jeans, the greenery was pine needles and I think it was tea dye for the sand.  I splodged the inks on my non stick craft sheet, squirted a bit of the gel next to them and made paints to create a light washed looking background. After stamping the puffin, beach and birds with staz on, I then used the technique again to paint them in.  These stamps are from  Sheena Douglass A Little Bit Scenic Stamp Set - Sea Scapes.  I then inked the edges of the plaque with faded jeans distress ink and cut and dry foam. 

The shells were made by applying Luminarte Silks Acrylic Glaze - Set 7 randomly to the reverse side of a piece of Centura Pearl card.  I dusted over with an anti-static bag and then stamped all of the shells from Sheena Douglass A Little Bit Scenic Stamp Set - Sea Shells with Versamark.  I then heat embossed with an antique gold embossing powder.  The shells were then cut out - this took a little while but I don't mind cutting out!  I added the shells in a formation I liked by playing with them before sticking them down with sillicone glue.

The plaque was finished by tying a ribbon through the holes to allow it to hang.

I really loved making this project as I love the seaside and I love MDF as I think papercraft is more than making cards and scrapbook pages.  Home Decor is a great way to show off your work.

As I said earlier, I made this at one of Sheena's workshops, so I'm certainly not taking credit for the design as it is of course the wonderful Sheena's!  The workshops are great fun and you always learn lots.  She will be doing more in November time so it's worth popping over to her website to find out more nearer the time - I think they will be announced in the summer.  

Thanks for looking and enjoy the sunshine this weekend!

Tuesday 15 April 2014

Second of two posts today!!!

I needed to make a Get Well Soon card for a family friend today so I got my Card-io Majestix stamps out.  I love this range of peg and accent stamps as they make simple stunning cards quickly.   
Here's what I made.


I used the Oriental Blossom Stamp Set which is a must have item from their range as it has the fabulous branch in it which can be used with loads of their other sets.  The large dragonfly is from their Dragonfly Garden Stamp Set and the cluster of smaller dragonflies are from their Mum's Garden Stamp Set.  You put the stamps on the end of the see through pegs.
I used an Espresso Adirondack ink pad to stamp out the branches first.  The arc of the branch stamps into a circle brilliantly.  I stamp it at 12 o'clock and then stamp either side of it without re-inking with second and third generation ink, then the same at 6 o'clock, 3 o'clock and 9 o'clock.   I then add in any extra branches where it looks like it needs it.  It's surprising how easy it stamps into a circle.  I only had to do it on a piece of scrap once the first time I used them to master the technique.  I then stamped the leaf first with Meadow Adirondack and then with Sage Versacolour around the edges of the wreath.  I stamped the two different flowers in between with Heliotrope and Amethyst Versacolour.  I stamped out the sentiment  using a Whispers purple brush nib pen for the ink so it would match the lining that I was going to do for the edge framing with the thin nib.  The dragonflies were stamped with Atlantic Versacolour.  I stamped out a similar design on the flap of my envelope.  
I then used Magenta Stickles glitter glue on the middles of the flowers stamped in Amethyst and Lavender Stickles on the middles of the flowers stamped in Heliotrope on both the card and envelope.  I finally used Star Dust Stickles on the wings of all the dragonflies.

I hope you like!  I'd urge anyone to give these little stamps a go as they are easy to use even for a beginner!


First of two posts today: Fleathering!

So, I have got a bit addicted to this technique and I showed a picture frame that I made with it a few posts ago.  Today I can show you what I have made with two of Sheena Douglass' brand new embossing folders from her India range.  It is currently the 4 Day Deal on C & C here.  If you get it though, you must add the matching 6 stamp sets too!


I have taken the technique further though using Pebeo Gilding Wax and  Luminarte Silks.  I used Sheena's technique which you can find on You Tube here.  It has now been viewed over 17,000 times!  Lots of Chemists are selling out of glycerine!  The tutorial for adding in the pages to make a book (like my first picture) can be found here.
In the first picture I have made a finished book.  The second and third pictures show you the piece of 'fleather' that I have made and is awaiting being made into a book!  I need to buy some material to line it with later in the week.  
In Sheena's online tutorial she just uses distress inks to colour the Kraft Card and they therefore look very brown and leathery.  This is like the frame that I made a few posts ago.  What I have made goes a step further with paints and gilding wax.  The Distress Ink that I  used on both was Dusty Concord.  I then painted the images in with the Luminarte Silks.  After painting (the silks dry very quickly), I used Pebeo silver gilding wax to rub over.  You need the tiniest bit on your finger, I tap off the excess on my craft sheet and go back to it as needed.  After gilding I sprayed with Crafter's Companion Spray and Shine.  I love this product for getting a shiny finish: it takes seconds and no brush strokes - fabulous!
I got to use these two folders as a sneeky peek.  I cannot wait for my order to arrive from C&C so I can play with all of the other products.  
If you've been watching her today on C & C you will have seen her using glycerine to brayer onto embossing folders, emboss in the E Bosser and then use embossing powder over the glycerine.  It looked amazing and is one of her new techniques that I will be trying when my order arrives!

I hope you like what I have made.  Thanks for looking!


Monday 14 April 2014

Decorative floral heart

I'm really pleased with this one and it hardly took any time at all!


I got the rattan heart from Hobbycraft a few weeks back - it only cost about 80p in a mulibuy.  The flowers were made with a collection of Tattered Lace dies that were a Pick of the Day a month or so back on C&C.  You can find the whole collection here on the Tattered Lace website.  
I cut the leaves from the Lavish Blooms Leaves set - they were the inside waste from two of the leaf dies.  I cut these from pale green cardstock that I had in my stash.  
I used pale yellow Centura pearl to cut the smallest die from the Lily set four times and the straight stamens from the stamen set twice.  This was enough to make the two smaller flowers.  To make each of the smaller flowers I used Sue Wilson's technique that you can find on the Creative Expressions site here.  Each one had just two layers so I just slit into the middle with the first layer and cut one petal out of the second layer.  I used Cosmic Shimmer Glue as it dries clear and quickly so you only have to hold for a few seconds.  As I rolled the stamens I put a small dollop of glue every few centimetres along the base to hold it together.  I then assembled the flowers.
To make the large flowers I used pale pink Centura Pearl cardstock.  I cut and embossed the filigree die from the Lavish Blooms Poppy four times as this one has four layers.  Using the same technique, I cut into the first one, cut one petal out of the second one, two petals out of the third and three petals out of the forth.  You have to be careful to line these ones up properly when gluing as the filigree is so detailed, this isn't tricky to do though!  I assembled the layers and glued a pearl into the middle of the completed flower.
I tied a messy bow to the loop at the top of the heart with some pale yellow organza ribbon that I had in my stash to match the yellow flowers.  I then glued the flowers on with silicone glue.  I glued the smaller yellow ones first and then the larger pink one to get some dimension with  the yellow ones behind.  I then tucked in the leaves where they looked right to frame the flowers - I just pushed them into the silicone glue.

I'm pleased with the look of this one and it was quick and easy to make eventhough it looks more complicated.  I often use inks with flowers but i felt that with the Centura this looked cleaner and more elegant plain.  I think it would make a great little inexpensive gift for a loved one.

Thanks for stopping by...please say 'Hi'!  

Another animal card - I love these stamps!

Here is my third creation with Sam Poole's animal stamps.  For this one I have used Nutkin Squirrel.


The base of my card is made from Centura Pearl brown cardstock.  I stamped Sam's Feathers A6 Rubber Stamp with Versamark and heat embossed with gold embossing powder on a piece of Centura Pearl hint of gold card stock.  At the same time I stamped the sentiment and heat embossed that too.  I stuck this on the brown card.  I then cut the largest die from Spellbinders Nestabilities Card Creator: Branching Out from some green pearlised cardstock that I had in my stash.  I layered this onto the feathers piece.  I used another piece of brown card to emboss with the tree bark embossing folder shown on my previous post with Hoot the Owl which I used gold gilding wax on.  I layered this on top of the die cut piece.  
I stamped Nutkin with brown Versafine and used clear embossing powder to heat emboss.  I painted him using a mixture of two of the new  Cosmic Shimmer pearl, bronze and gold paints.  I used Sepia Glossy Accents to make a 3D eye and when dry I added a black dot for his pupil on the top with a black Sharpie pen.  I was really pleased with how this worked.  I used foam pads to raise him up before attaching him to the card.
I made the three acorns out of Martha Stewart White Clay and the  Martha Stewart Woodland Molds.  The link takes you to Oyster Stamps where the clay and molds are really good prices.  I much prefer to use the white clay for everything and paint it rather than mixing the coloured clays into the white as I feel that the effect is much better.  I painted the acorns with Pebeo acrylics when they were air dry.  When the paint was dry I used Crafters Companion Spray and Shine High Gloss Varnish  to make them shiny.  
I cut some leaves out of three colours of felt with Tim Holtz's Sizzix Bigz Die - Tattered Leaves.  This is a great die and you can also get a matching embossing folder to use if you are cutting them from paper which is great.  I stuck the leaves to the bottom right hand corner of the card and stuck two acorns on the top and the third in Nutkin's hand.  
I cut the sentiment out into a flag shape and used 3D foam to give some dimension.

I hope you like!  Thanks for stopping by and saying 'Hi!'

Friday 11 April 2014

Sam Poole's fantastic new animal stamps!

I've been having great fun with these new stamps from Sam Poole.  They are very reminiscent of children's book characters.  Being a child at heart myself, I fell in love with them as soon as I saw them!  You can find them on Sam's website: Hoot the OwlNutkin the Squirrel and Mr Bear.  Those are the three I have used in the cards that I will post today and tomorrow.  There is also a rabbit, fox and mouse that I need to play with next!  I need to buy the fox at Ally Pally tomorrow!!!

Here's my first card made with Hoot the Owl.


I used some lovely textured gold cardstock that I had in my SABLE (Stash Acquired Beyond Life Expectancy)! I embossed a sheet of brown Centura Pearl cardstock with Sheena Douglass' woodgrain embossing folder.  I then used gold gilding wax to bring out the grain.  I overlaid a leaves mask onto the green cardstock which is one of the That Special Touch Masks.  I used a Versamark inkpad through the mask and then gilded the leaves.  I used Sheena Douglass' branch stamp over the top and then painted it in with Pebeo acrylic brown paint.  I stamped the Owl and the sentiment in brown Versafine and embossed with detail clear embossing powder.  I painted in the owl with the fabulous brand new Cosmic Shimmer Shimmer paints which are fabulous.  (I have several of the Luminarte silks and wanted to try the new Cosmic Shimmer ones to see how they compare.  I am VERY impressed as they seem to be just as good but are a lot cheaper which is great!)  I cut him out and stuck his feet flat on the branch and 3d foam on his upper body to give some dimension.  I mounted the owl and sentiment on brown Centura Pearl and then added another layer of the gold behind the owl again.  I matted this onto the woodgrain background and then added some grosgrain and ricrac ribbons.  I made an embellishment with a button, some baker's twine and some more ribbons.


Here's my next card made with Mr Bear.


I used Spellbinders Grand Labels One to make my card base and the frame.  I cut the base out of Centura Pearl Brown twice.  I then scored in an inch down one side of one of the pieces to make a flap.  I glued this flap down to the other piece to make the card base. I then made a frame out of mink Centura Pearl.  I cut another piece of stamping card the same size as the outer size of the frame.  I stamped the tree background onto this and again onto another piece of stamping card with brown Versafine.  I then embossed the line with detail clear embossing powder.  I did the same on another piece with Mr Bear. 
I used a couple of different brown H2O colours to paint in the trees, making the tree at the front darker for more definition. When dry, I cut out the front tree from the second piece of card.  I used luminarte silks to paint in the grass by dabbing together two different green shades to give texture.  I then painted in the sky with blues.  To create the moon, I punched a circle of Hint of Silver Centura Pearl cardstock and stuck it down.  I added the front tree over the background trees using 3d foam.    I added a little bit of colour to Mr Bear with Spectrum Noirs EB1 and EB2.  I cut him out and mounted him with thicker 3d foam than I used on the trees to make him stand out more.  I then added some stars using silver Stickles.  I added the mink frame that I had made using 3d foam again (I like my 3d foam to add dimension, it really makes a difference to having flat elements).  
I used the leaf stamp from Sam's set: Woodland Seals to stamp into several molten layers of Cosmic Shimmer Ancient Copper Detail Emboss Powder.  I then used Golden Green Gilding Wax to rub over and bring out the leaf detail.  I made an embellishment with this, some baker's twine and some fab textured  handmade paper ribbons from my SABLE and a bit of Gold Tulle and stuck this on.

I hope that you like my creations and that you have a go at using these stamps as they are fabulous!  

I will be back tomorrow to blog my Nutkin Squirrel card when I get back from Ally Pally!

Thanks for stopping by...please say 'Hi!'


Wednesday 9 April 2014

An Easter Tree!

I'm not really into fabric crafting, but I caught a Pinflair show on C&C before Christmas and ended up making some great Christmas baubles.  (Unfortunately these are now packed away for Christmas and I didn't photograph them, never mind... They will be back later in the year).  They have also brought out kits for Easter so I've had a go and am pleased with the result:


There are two types of decorations: Pastel Fabric Pinecones and Sequin Eggs.  The pinecone eggs make up really quickly - I sat and made them in front of the telly.  The smaller sequin ones take a bit longer and are a little bit more fiddly but not difficult.

I hope you like my Easter tree and that it inspires some of you to have a go!

I'll be back tomorrow with some cards that I have made using Sam Poole's new animal stamps that I am in love with!

Tuesday 8 April 2014

Another post ... in the same day ... to catch up!!!

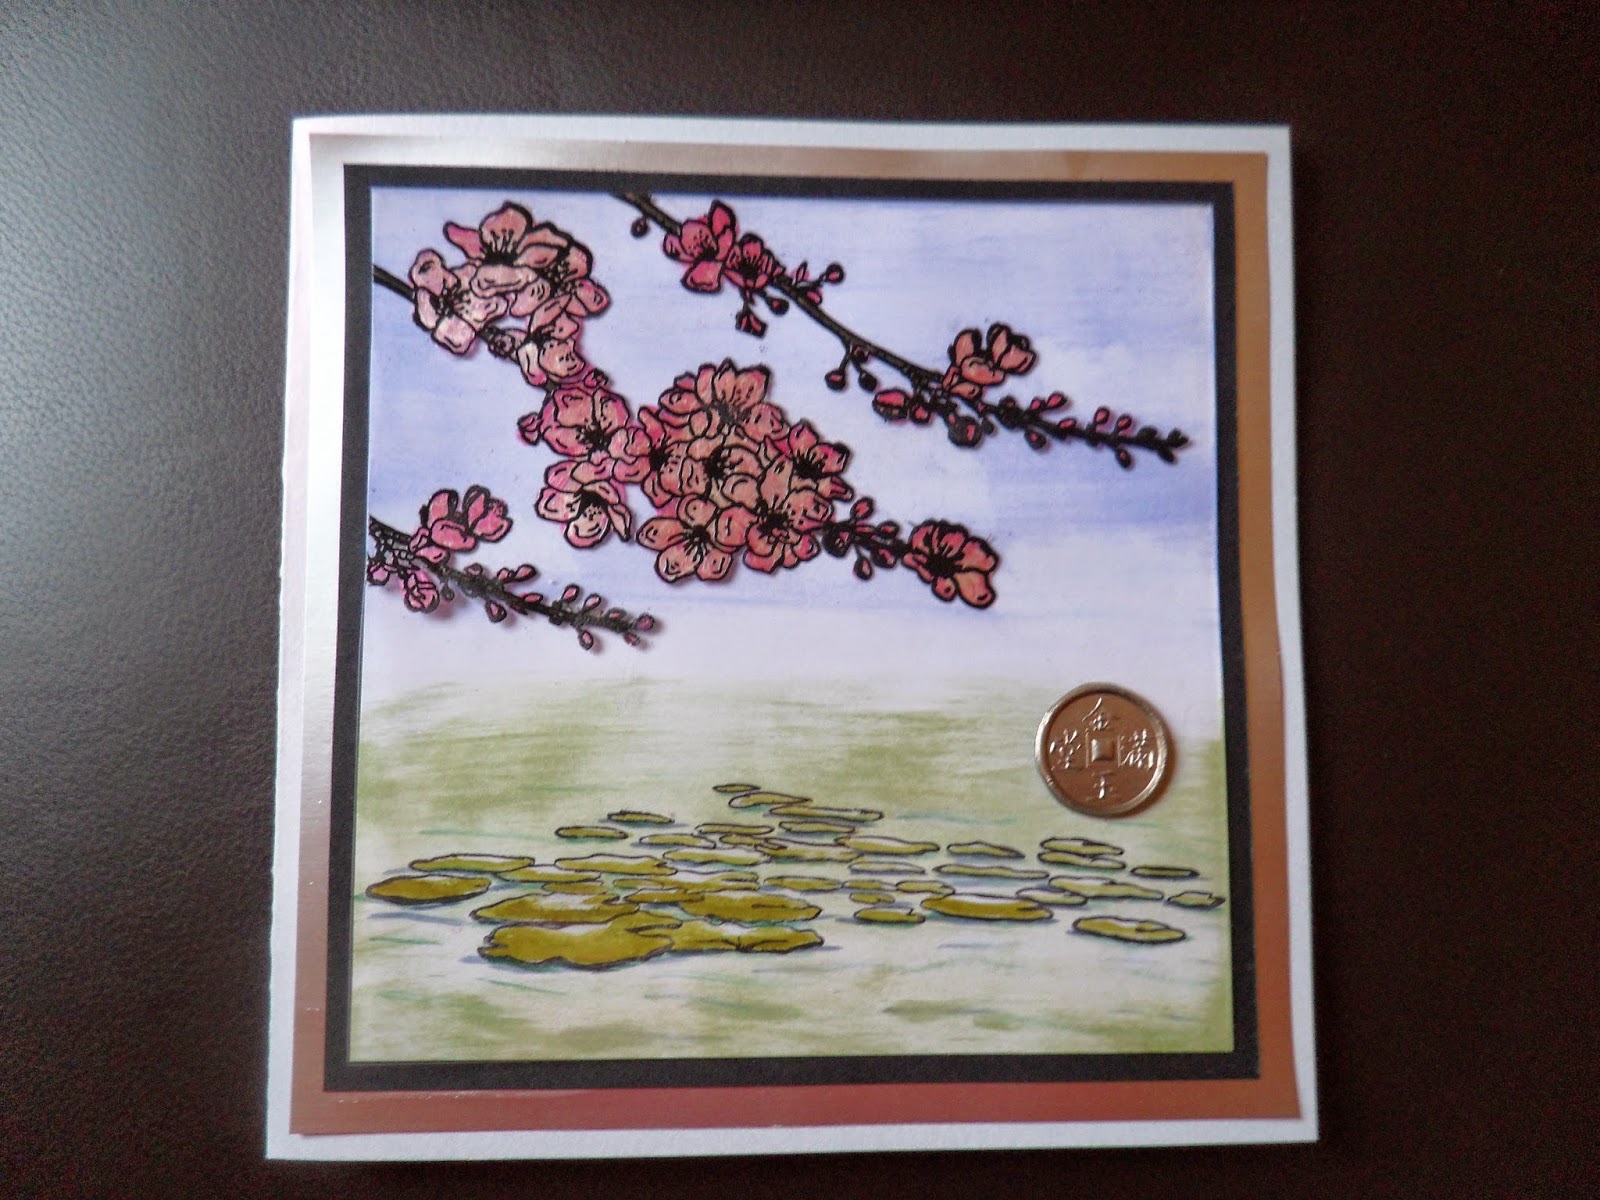
So here I am again, adding a few more recent pieces that I have been pleased with.  Here is a card that I made for my Sister's birthday using Sheena Douglass' Oriental stamps: here.  This was inspired by one of the video tutorials and involved stamping the cherry blossom stamps and embossing them on acetate then painting in the reverse using the Pebeo acrylics.  The background was made using Cut & Dry foam with Distress inks.  The coin was stamped into UTEE.  As I said, I cannot take credit for the general design as it's Sheena's but I was really pleased with how it came out as I had never used the acetate technique before!


Here's a thank you card that I made for my parents using Clarity Stamps.  The thank you stamp was from their New Designs Club a few months back but you can get it here now.  The Leafy Swirl stamps used for the background were an old classroom set and the Cat and Bird are from another classroom set.  
I stamped everything in Black Archival, matted and layered with black and burgundy card and used one of my favourites - an 8" scalloped card blank.  I die cut some flat flowers (a fussy 3D one wouldn't have worked with this design) and used an over sized brad in the middle.


I've also been fleathering!  Sheena Douglass is a genius to work out this technique with Glycerine.  You can see how to do it here.  It's been viewed over 16,000 times in a couple of months!  I used the technique to make this picture frame:


The picture frame was about 60p from IKEA which was a bargain!  I used Sheena's A4 Ivy Embossing Folder and Walnut Stain Distress Ink to create the technique. I then wrapped the frame in it using a strong PVA and red line tape to hold it down.  
I made the two corner embellishments using UTEE in my Melt Pot with Martha Stewart Antique Molds I gilded them with Pebeo Wax.  
I was really pleased with this frame, I just need to find an old sepia family photo to put in which I think would work well.

OK, I am off to play with some of Sam Poole's wonderful new woodland stamps now.  I'll be back tomorrow with some more creations!  I'm off work for two weeks so there will be quite a bit appearing.  I will then vow to blog at least once per week!  I hope you enjoy my ramblings!!!


Back on the blogging road!!!!

OK, so I didn't fulfill my New Year's Resolution in any way shape or form...never mind...that's what ends up happening with resolutions!

Anyway, here I am again.  I have taken photos of some of the things that I have done in the last few months and I'll put them on over the next few days, including a few tonight!

First of all is a card that I made to go with the Spellbinders blooms picture that I made using the same dies and cardstock (see details in the post below):


I used a scalloped 8" card blank and matted the piece onto glitter card.  With these blooms pieces I wanted to keep it clean and simple and so I didn't use inks on them. I wanted the leaves to have a bit of movement so I didn't fully glue them down.