Thursday 10 October 2013

Spellbinders Die D-lites Picture

Hi all!

I have just completed this for my friend Annie's Birthday:

I used Spellbinders Die D-Lites Blooms 1, 2, 3, 4 and Sprigs 1 and 2.  I cut them out of a brights DCWV 12 x 12" card stack.  I used an embossing mat and large ball tool to work the backs of the die cut flowers to give them shape and dimension.  I then layered them up with sillicone glue and added flat back pearls to the centres of some.  I got this frame:  IKEA RIBBA frame which is a brilliant box frame and only £3.50.  It does have glass in it but it's not good to take a photo with the glass in!
I'm really pleased with the finished piece and it's cost less than a fiver to make.  The frames are great and they come in black too.  I hope that this inspires someone else to have a go!

Monday 30 September 2013

A Sizzix Halloween

Hi all!

Well, Halloween is in a month's time and my friend Albert gets very excited about Halloween as we always have a party.  We have a month of it at his house and we are decorating tonight - no room gets left undecorated...we do everywhere: the lounge, office, kitchen, bathroom, loo and bedrooms!  It takes hours but always looks fab!

So, in order to celebrate I made him this:
It does have glass but I had to take it out to take the photo as otherwise there's too much glare!  I used the Tim Holtz Bigz die with the Raven and Cat on it with the Sizzix Halloween and barbed wire embossing folders. I cut the barbed wire embossing out of mirror card which I think worked really well.  The background is purple glitter card which works well with the orange on the embossing which I sanded back.  I used some stick on clear gems which I coloured with promarkers for the Raven and Cat's eyes, I put both of these on 3d foam pads.. The frame is a black Malm box frame from IKEA and cost about £4.  These frames are great as you can use them for 3d projects and they do them in different finishes.

Sunday 29 September 2013

Clarity Challenge: Vintage

Hi all!

I'm not the biggest fan of vintage to be honest so in Worzel Gummidge style I had to get my thinking head on!  So, I've been thinking and thinking and then very near the deadline tomorrow I have created my entry today using the Carousel HorseCarousel Corner and Rope stamps.

I stamped the horse and added the rope (which is so easy due to the stamps being clear) with versamark on Theuva Card.  I embossed with silver embossing powder and painted in with a variety of mica powders.  When he was dry I cut him out.  I stamped and embossed the corners with the same silver embossing powder on the corners of a 6" x 6" Basic Grey sheet from their Two Scoops range (this is a few years old).  I used another sheet to cut the letters N O T E and S on my Cricut Expression using the storybook font cartridge as this is quite vintage looking.  I glued the letters and the horse on.  I then glued half pearls to the top and bottom of the piece.   I then stuck the paper to a piece of chipboard to make the notebook cover.  I also attached another plain sheet to another piece for the back cover.  I punched five holes down the right side of the cover, in between the stamped corners and tied coordinating ribbons through.  I used my We R Memory Keepers Cinch to punch the holes on the left hand side of both covers and the pages that I had cut.  I then bound them together with pink wire.  I tied more ribbons around the wires.


I hope that you like what I made.  As I say, I'm not really into vintage so I'm quite pleased with the finished piece.

Thanks for stopping by.  I'm going to start blogging a lot more regularly now so please pop by again soon.  I'll be posting a Sizzix Halloween piece to tomorrow!

Saturday 7 September 2013

Countryside Scene

Hi all!
I've been busy creating this weekend!  Here is my creation as a present for my Dad who lives at Nineveh Farm where they have many deer and pheasants.  I've photographed it before putting the glass in the frame to avoid glare!  I used Clarity Stamps (surprise surprise!!!)  Letter Box SetDeer SetLarge Pheasant, Birds from the Harbour SetLarge Silhouette Sapling Clear Stamp and Landscape Mask Set with Adirondack inks in Cloudy Blue, Willow, Meadow and Butterscotch for the scenery and the Ranger Archivals in Sepia and Black (all available on Clarity website too).  I didn't use a brayer or a make up sponge, all of the inking was done with Inky Dusters.  The frame was just a cheap one for a few pounds from IKEA which comes with the mount.  I made my scene on theuva card and then mounted it.  I stamped the words with Ranger Sepia Archival and pheasant with Black Adirondack on separate cardstock.  I coloured the pheasant with a variety of Promarkers and a blender.  I then cut them out and then attached them to the mount.


Wedding Card

Now, this is not my normal style at all but as it's a wedding card I wanted to try something ornate... I've just finished this wedding card for my Cousin and his wife to be.  I used Spellbinders new release Majestic Labels 25 which is a stunning set.  The white card is linen effect and I've then cut layers of this and silver mirror card with the Spellbinders.  I've used silky crush white ribbon, a silver dazzler and beautiful flat backed pearls to embellish.  It's very hard to photo mirror card but the photo gives you a reasonable  impression!

Saturday 31 August 2013

Hi everyone, well, having been so busy sorting out my new business I've left it to the last minute for this month's Clarity Challenge entry!  I'm quite pleased with it in real life but because of the colours of the pheasant and the background being quite similar the photo does not come out as well as I'd like it to. It does look much better in real life!  Unfortunately I've not got enough time to start a new creation as the clock is ticking to submission time!  Anyhow, I used a Dreamweaver stencil of the forest for the background with their copper coloured glitter paste.  I used the large clarity Pheasant which I stamped in Espresso Adirondack and coloured in promarkers.  I also use the Clarity 'Thank You' stamp from last month's club.  I made an 8" x 8" scalloped card into an easel card and mounted the background and sentiment on brown and gold.  The pheasant was stuck onto the background with several pieces of 3D foam layered on top of each other to bring him out of the background - this is far more evident in real life though!

Saturday 24 August 2013

Hi everyone!
Well, I've not been very good at posting for the last couple of weeks as I've been sorting out my new business...details to be released soon!

I'm posting a couple of piccies today.  Firstly is a card that I finished after attending the Claritystamp workshop at West Meon a couple of weeks ago, it was made using their Making A Point Kit aong with the Tall Trees Mask.  I'm loving that they are bringing out lots of masks as they are much better than post its that you have to make yourself (which isn't the fun bit).  Often they start curling, sometimes resulting in spoilt artwork, so I love the masks!  The inks I used were Adirondack pitch black for the line art with Stonewashed, Denim, Mushroom and Juniper.


Something else to share is a double scrapbook layout that I have completed from my holiday to see my Sister Laura in Vancouver (which was ages ago!)  I used Scenic Route papers but the strip was cut off so I cannot remember which collection they were from (sorry)!  I do know they are a few years old though!  I cut out the shapes by hand and layered them up.  I think the papers work well with the subject of the racoons.  I used Scenic Route letter stickers for the title which I kept straight as it looked better.  I did my journalling following the lines of the shapes in the bottom right using a brown archival pen.  This is a memory of a really great day, I fell in love with these racoons and got so close up to them it was amazing!


Monday 19 August 2013

Hi all!
Just a quick post to say that I'm excited as I'm featured on the Clarity Challenge Blog today because I was one of the top 5 last month!  I am still cooking up ideas for this month's animal challenge!
I will pop by again later and post what I have been up to recently when I've uploaded some photos!

Monday 5 August 2013

Hi all! Today I am sharing what I have sent to my sister in Canada as a 'thank you' for being so fab. I saw the mdf heart blank that I have made the door hanger decoration from in The Range for a pound, bought it, got it home and then decided what to do with it. I'd got some Indigo Blu stamps all based on 'Pride and Prejudice' - a wonderful book. The silhouettes fitted perfectly so I decided to use them. I painted gesso all over the mdf for the base coat to stop the wood absorbing the paint. I then painted the grass, sky and clouds. I allowed enough time to dry before stamping the characters of Mr Darcy and Elizabeth and the title from the  Indigo Blu 'Mr Darcy' set.  I then used Clarity Stamp's Cherry Blossom stamp on the front and the back and the swallows from the Clarity Classrom Set 18.  (There are swallows in the Indigo Blu set, but I felt the size was better with the Clarity ones and the fact that the Clarity ones are clear is much better for positioning.  I used Ranger Archival Black Ink Pad to stamp the images.  I then used a Sharpie black marker to retouch any areas that needed going over.  I used an American Crafts Galaxy marker to colour the leaves on the branches.  After letting the ink dry I used matt varnish all over.  I then went over the leaves with green stickles and Cosmic Shimmer Coloured Pearlescent PVA Glue in Vintage Pink (petals) and Golden Pearl (centres).  When everything was dry, I used some American Crafts stitched grossgrain ribbon to tie a loop which left enough room for a door knob to go through and then tied a bow with a seperate piece at the top of the heart.

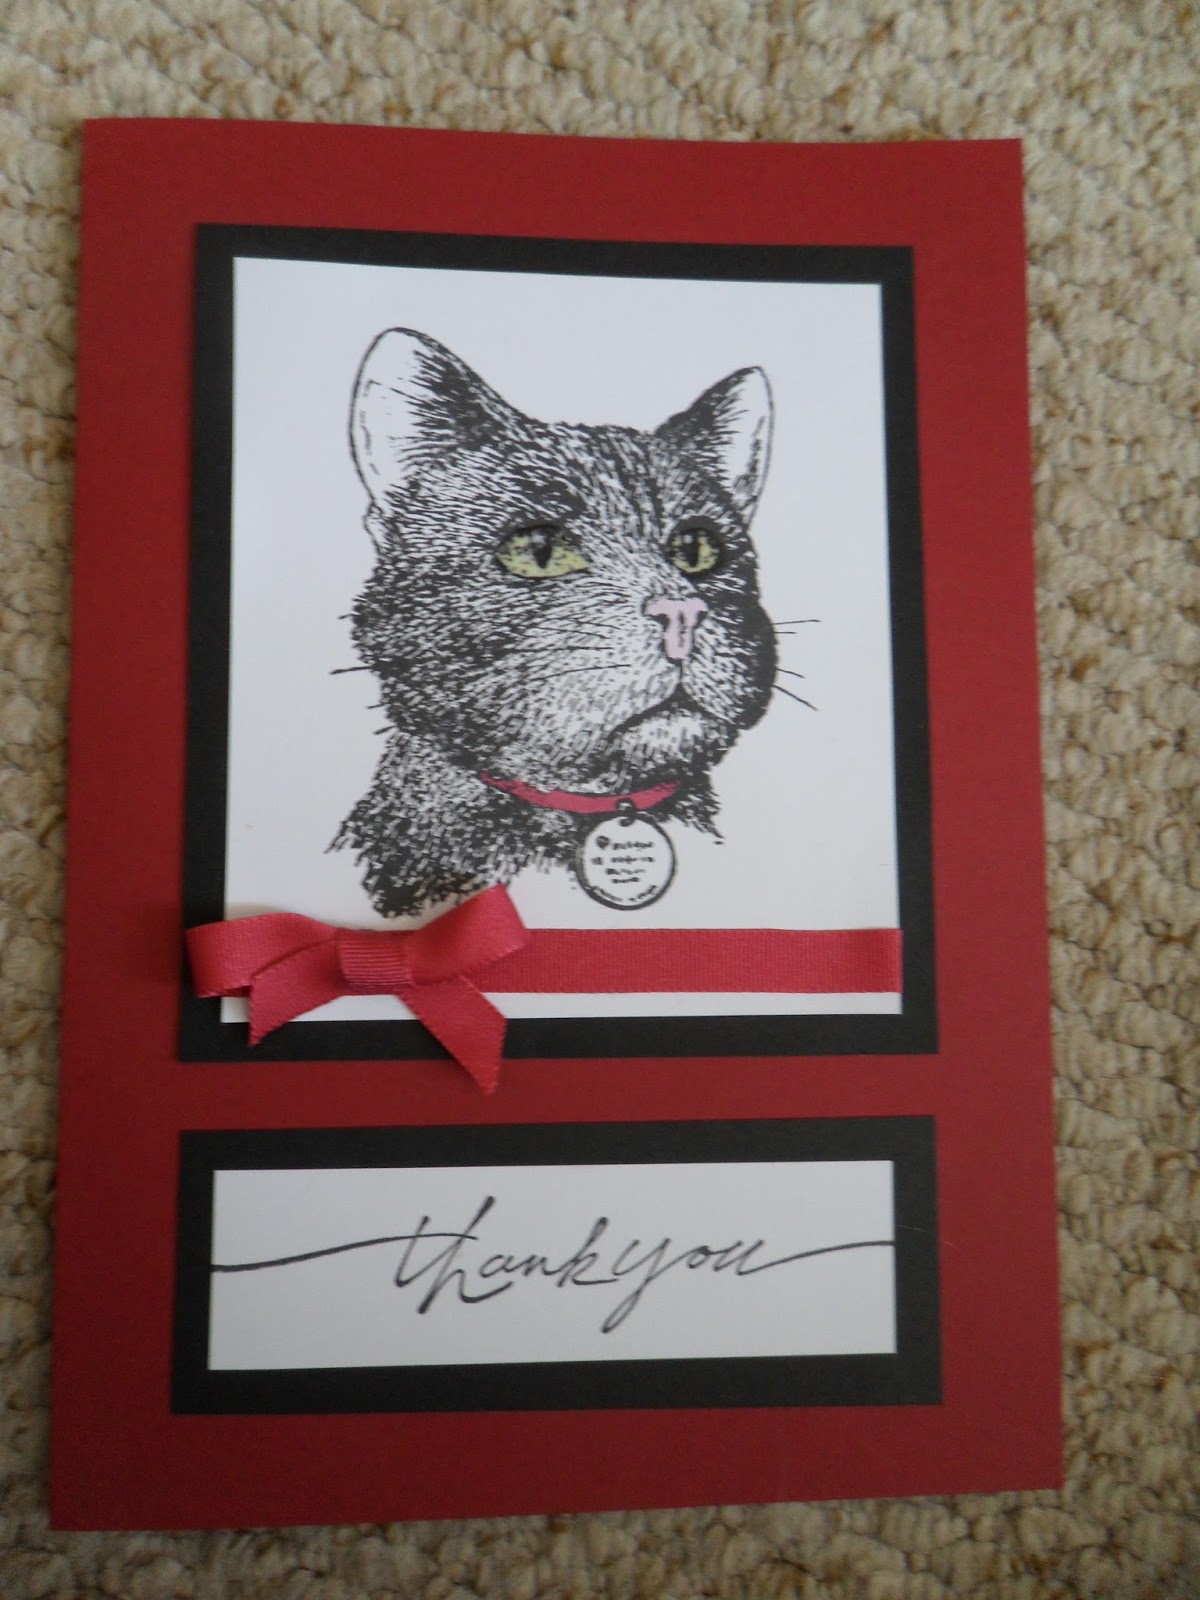
To go with the hanger I made her a thank you card.  This is a simple one but I idn't think it needed any fuss as it's such a great large image.  I stamped Stamps away 'Tiddles' in Black Soot Distress Ink when it dried, I then used a very pale green promarker to colour his eyes in, a pale pink promarker for his nose and a burgundy promarker for the collar - that matched my cardstock.  I used a Versamark pen and clear embossing powder to pick out his eyes.  I matted and layered him up and added some ribbon.  I used a thank you stamp that I have had for years from Stampin Up - I love the handwriting style on this stamp.  As I said, a simple card but I think it works well so the image does the talking.


I hope people are enjoying reading my blog, thank you for stopping by. Please don't hesitate to ask if you have any questions.

Sunday 4 August 2013

Hi all, blogging today to share what I made as a result of yesterday's In The Classroom with Barbara Gray. I'm loving making the frames for stamped images with the Gelli Plate. In addition to making the sky with the Stonewashed Adirondack ink, I added some hills using the Adirondack Willow. I then matted and layered my piece onto a background I made using the Stonewashed and Willow Adirondacks again. I used a make up sponge to alternate areas of the ink and then rubbed over them to make a lovely blended tone. I only did around the edge of the piece of card as it was only for a narrow border. I then matted this onto a piece of brown card to tone in with the acrylic paint that I used on the Gelli Plate.

Saturday 3 August 2013

Morning fellow bloggers! I thought that I had better share what I made from last month's Barbara Gray classroom before this month's one - which begins in 15 minutes!!! First of all there is the hares and toadstools set with the alcohol inks. I made this card up for my Dad's birthday a couple of weeks ago:
Then in the second part of the classroom was the Birdhouse set which is a lovely silhouette set. It was my Aunt's birthday the day after my Dad's so she got this card:
I'm looking forward to the In The Classroom with the Gelli Plate this morning! I'll have more creations to share later. Happy crafting!

Thursday 1 August 2013

Really happy this morning...you can probably see the link above telling you that I have been given a TOP 5 in the Clarity Stamp Challenge for July's 'I do like to be beside the seaside'! It was for my altered mirror of a beach scene (it's a couple of postings below this one). It's only the second challenge that I have entered so I'm really pleased. The August Clarity Challenge is 'Animals' so I've got my thinking cap on and am cooking up a couple of ideas at the moment!

Wednesday 31 July 2013

I'm really looking forward to Barbara Gray's classroom on Create & Craft on Saturday morning with the Leafy Swirl set and the Gelli plate!  I've used my Gelli plate a few times and it's great fun.  We used it to make a lovely frame when I went to Barbara's workshop last week at West Meon.  I will get this photographed and added soon!

Here's what I created with the classroom set from June (available here from Create & Craft: Clarity Stamp Lesson 18 and here direct from Clarity Stamp: Lesson 18).  I love these stamps!  The silhouette stamps are always so versatile.

Tuesday 30 July 2013

I thought I'd start by sharing my entry into this month's Clarity Stamp challenge 'I do like to be beside the seaside' http://claritystampchallenge.blogspot.co.uk/2013/07/challenge-5.html
I altered a £1 mirror frame from IKEA.  I used the Clarity Stamps beach set, clarity card, core'dinations card, promarkers, stickles, acrylic paint and some sandpaper (£1 bargain from Wilkinsons).  I got more texture into the sandpaper and cardstock by tearing it. The core'dinations is great for this as you get the contrasting colour when you tear.
I really enjoyed doing this challenge, especially because I love anything to do with the seaside!

A new blog!!!

Hi everybody, I have decided to start a crafty blog to share what I enjoy doing with other people.  I get a lot of inspiration from the blogs of many other people and I hope as a result of doing this I will inspire a few of you.  I've got to get some photos taken and work out what I'm doing, but hopefully I'll be sharing what I'm up to in the next couple of days!  Thanks for stopping by and reading!